Office 365 allows us to access documents and emails from wherever we are at anytime. If you have had a packed out day you can easily get on top of your emails when you get home if you need to. Sometimes though you may not want to be emailing people at 10 o’clock at night, especially if you know they are always checking their emails. You don’t want to be seen to be disturbing their evening and at the same time you know it’s not efficient to be saving emails to drafts when you could just send them now.
Office 365 is there to improve our efficiency and flexibility and one of the great ways it does this is by allowing us to schedule our emails for specific times so we can just get on with our work. Here are our steps to scheduling your emails in Office 365.

The answer to scheduling emails in Office 365 is to delay their delivery. You just have them held in your Outbox for a specific time after you have pressed send. So if you’re replying at 10pm you would just hold the emails for 10 hours.
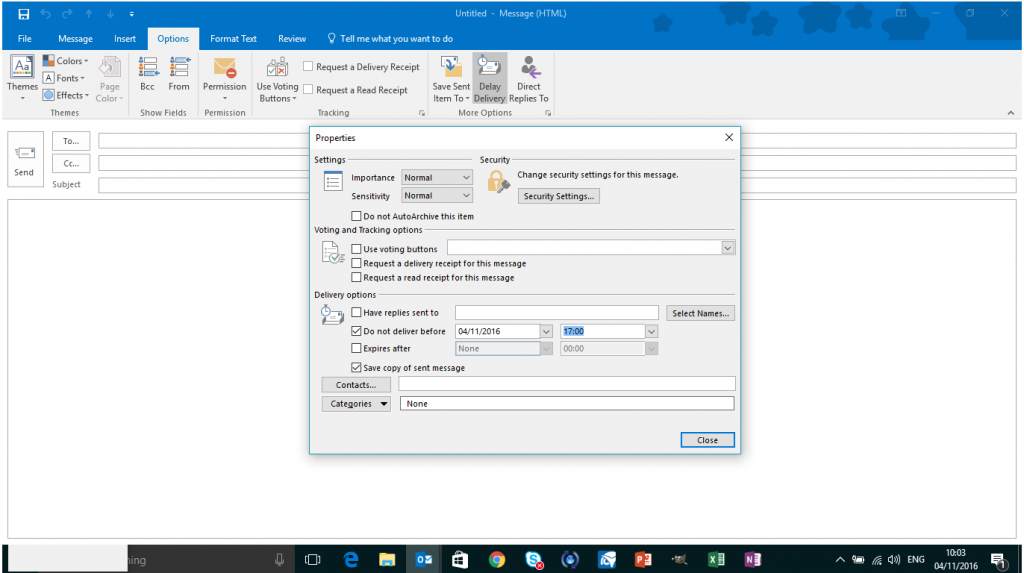
In the message window click on the Options tab.
In the tool bar you will see the option to Delay Delivery click on this

In the box above you can see that there is an option to not deliver before a specific time. Make sure that the Do not deliver before box is checked and select the date and time when it would be appropriate to send the email. When you press send the email will stay in your Outbox until the time that you have stated.
If you want to change your mind and send the email immediately, all you have to do is open the message in your outbox and go back to the Delay Delivery window. You just clear the check box that says Do not deliver before and then close the window and press send again.
If you aren’t using Office 365 and would like to be able to access its productivity features or just need general IT support then please feel free to get in touch.

